**Blender Outline Material Node**
# Getting Started
The Outline Material Node is a new line rendering node for the Blender Eevee and Cycles render engines.
Until it gets integrated into the main version of Blender you can get it on [Gumroad](https://www.gumroad.com/l/blender-outline-node).
On the downloads you will find a build of Blender 2.82a with this patch applied and an example .blend file with several node groups that show how to use the Outline node.
!!! Warning
You have to open the file with this custom build of Blender, if you try to open the file with a normal blender version you will just a see a black material.
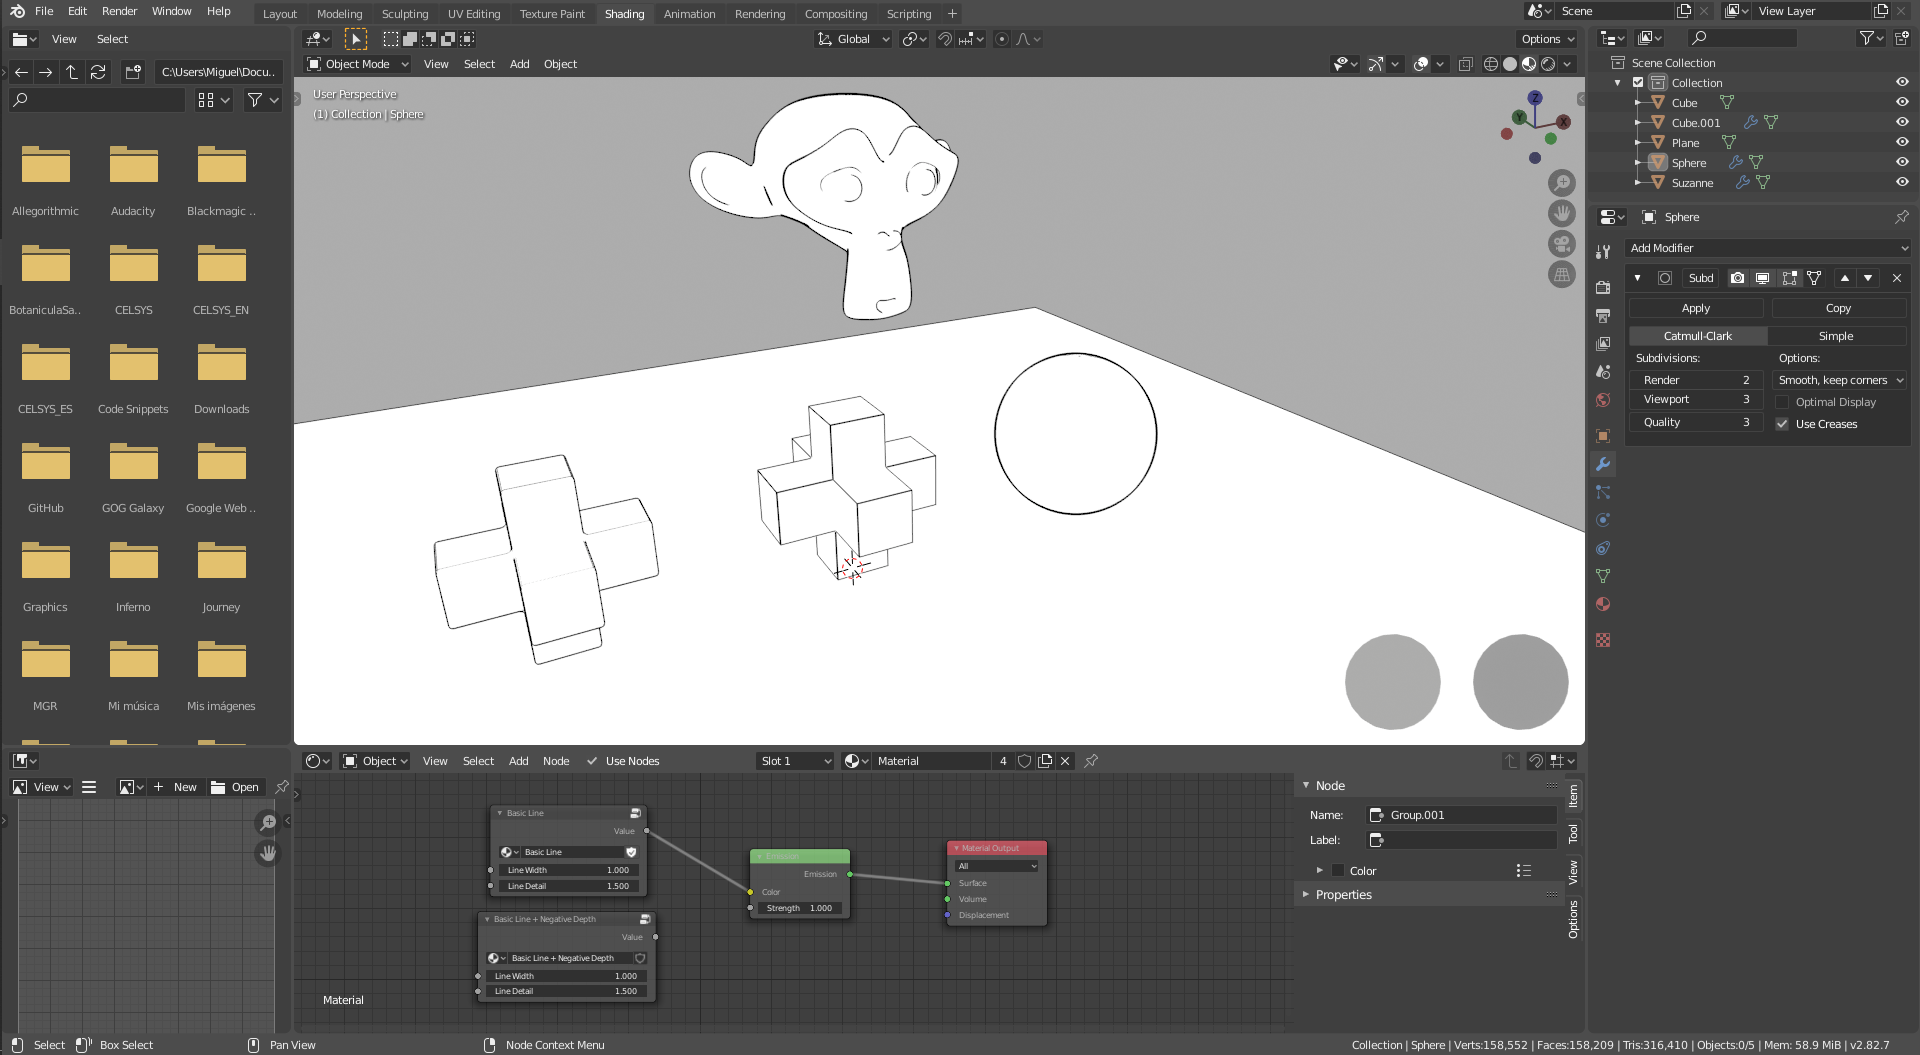
# The Outline Node
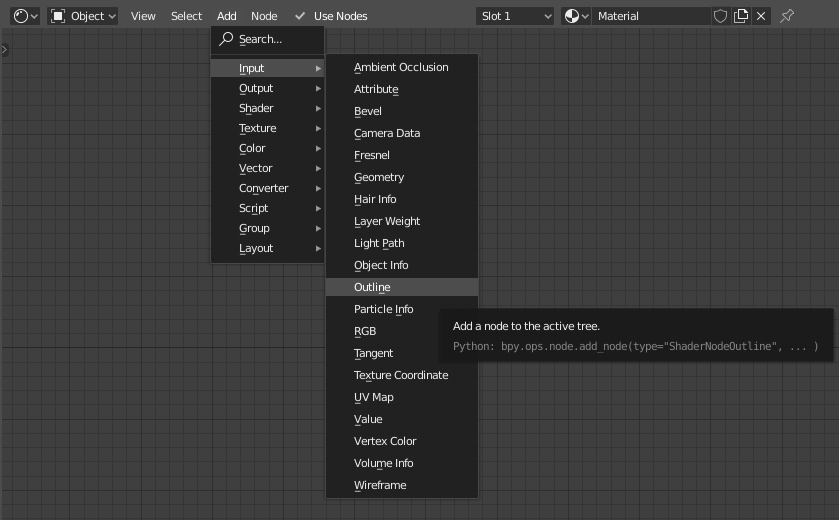
Since the node is a work-in-progress, it's still not as easy to use as it could be. Instead, it provides as many options as possible to let users experiment and setup their own custom line styles.
## How it works / How to use it
To be able to use the node to its full capabilities, it's better to have a basic understanding of how it works under the hood.
The node works by calculating the depth difference between the point that is currently being shaded and the points in the screen at the left, rigth, top and down of it.
Instead of simply calculating the depth difference as is, it calculates the difference with the expected depth at the offsets, taking the shaded point normal into account.
>
>*For example, if the point being shaded is part of a plane, and the plane is not perpendicular to the camera, the points at the offsets will have different depths, so using the depth difference as is would yield unwanted results.*
>
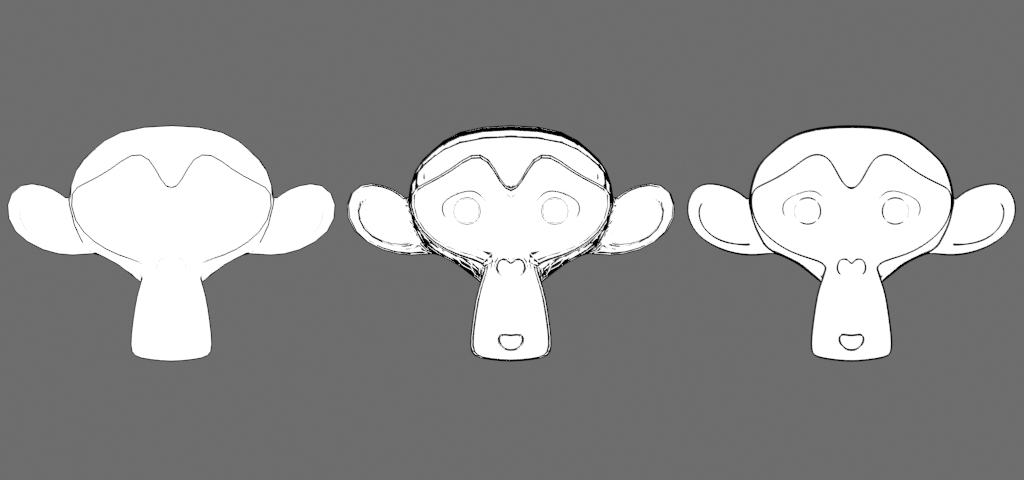
This also means that the larger the difference between the shading normal and the real geometry normal, the more incorrect are the results.
!!! Note
If your mesh uses **Custom Normals**, you might want to use the *True Normal* output from the *Geometry* node.
!!! Note
If you are using **Smooth Normals** on very low resolution meshes you will get better results by **subdividing** the mesh.
Then it checks all the depth diferences at the offsets - it separates the depths that are farther than expeceted (*Depth*), and the depths that are closer than expected (*Negative Depth*) - and outputs the largests ones.
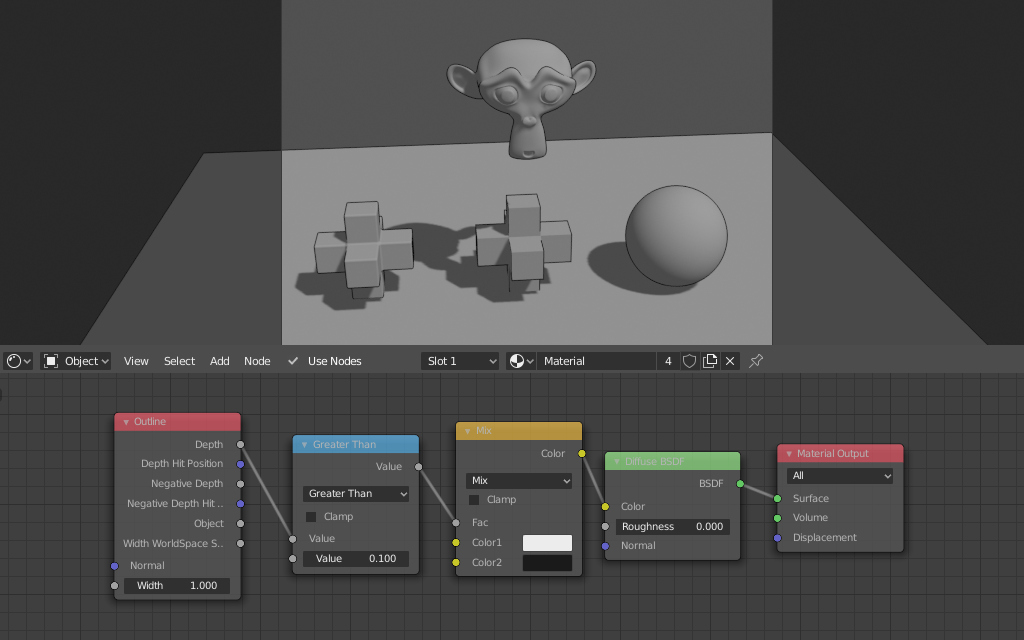
The simplest way to use the node is to check if the depth is larger than some threshold (*Math* node > *Greater Than*) and then use the result as factor for a *Mix RGB* or *Mix Shader* node.
!!! Note
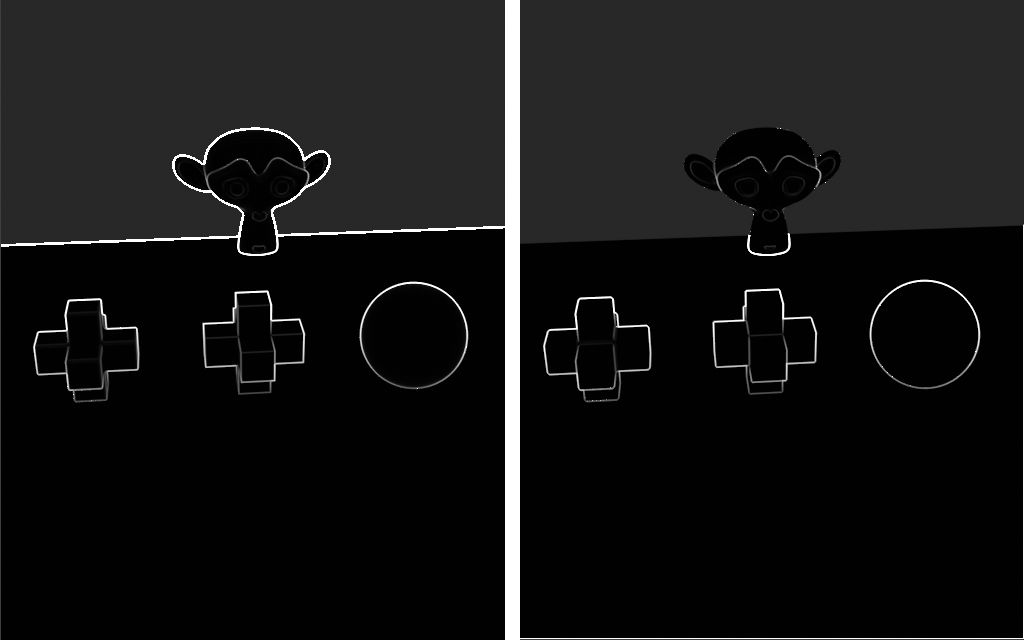
You will get more consistent results regardless of camera angle and object distance if you divide the *Depth* by *Width WorldSpace Size* before connecting it to the *Greater Than* node.
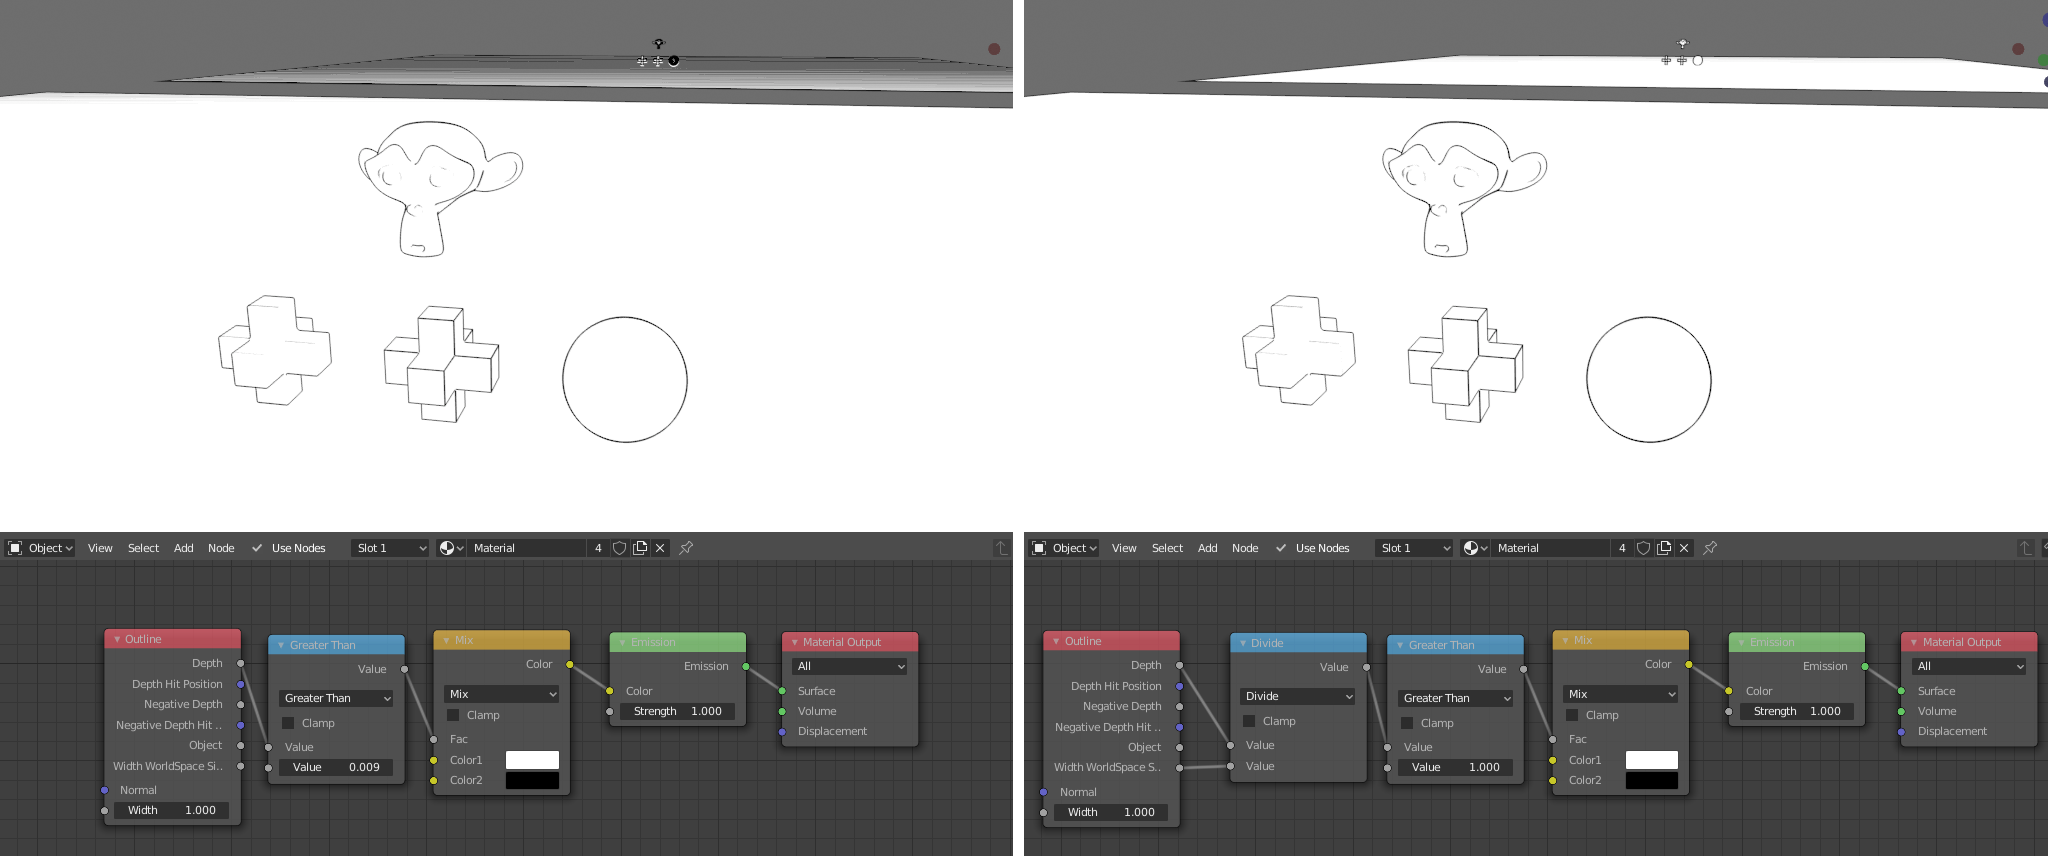
>
> *Notice how distant objects looks much better on the right image, after dividing the depth by Width WorldSpace Size and adjusting the threshold.*
## Limitations and Know Issues
### Limitations
- In Eevee, it doesn't work for alpha blended objects, there's not a simple solution for that and will likely stay that way. It works with alpha clipping (as long as the alpha is not driven by the Outline node), though.
- In Eevee, distant objects tend to output slightly off results due to depth buffer precision. In practice, it's solved by dividing the *Depth* by *Width WorldSpace Size*, as described in the previous section.
- In Eevee, subpixel line widths aren't as precise as in Cycles. Using entire numbers for *Width* yields better results.
### Known Issues (can be fixed)
- In Eevee, the *Object* output is not supported. (Always returns 0)
- In Cycles, the *Object* ouput works in viewport but not in render.
- In Cycles, alpha clipping is not supported.
- Very thick lines quality should be improved.
# Sockets
## Input
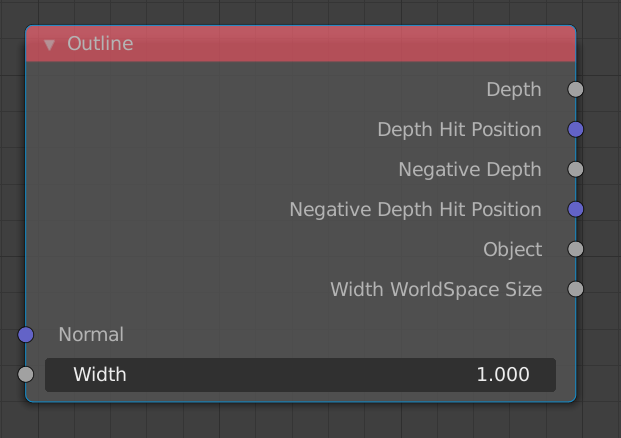
### Normal
The normal used to calculate the expected depth at the offsets. If nothing is connected the default shading normal is used.
### Width
The size in *screen-space* of the offsets **(in pixels)**.
## Output
### Depth
The maximum depth difference where the real depth is farther than the expected depth. **(in Blender units)**
### Depth Hit Position
The delta vector between the point being shaded and the *Depth* hit point. **(in Blender units)**
### Negative Depth
The maximum depth difference where the real depth is closer than the expected depth. **(in Blender units)**
### Negative Depth Hit Position
The delta vector between the point being shaded and the *Negative Depth* hit point. **(in Blender units)**
### Object *(Cycles only)*
Outputs 1 if there is another object at (at least) one of the offsets, outputs 0 otherwise.
### Width WorldSpace Size
The size in *world-space* of the offsets **(in Blender units)**.
# Q&A
TO DO